Install and Open MyPassRecovery on macOS
MyPassRecovery for macOS is currently distributed without Apple notarization. macOS Gatekeeper may therefore block the downloaded app or display an alert such as “MyPassRecovery” is damaged and can't be opened. You should move it to the Trash. On a Chinese-language Mac, the same warning may appear as “MyPassRecovery” 已损坏,无法打开。您应该将它移到废纸篓。 A similar alert can also mean that an app is genuinely incomplete, corrupted, or modified, so do not bypass the warning automatically.
Safety Check Before You Continue
- Download MyPassRecovery only from the official MyPassRecovery website or a download link supplied directly by MyPassRecovery support.
- Delete unexpected copies received through email, chat, forums, file-sharing sites, or search advertisements.
- If MyPassRecovery publishes an SHA-256 checksum, compare it with the downloaded installer before opening it:
shasum -a 256 ~/Downloads/MyPassRecovery.dmg
- If the warning says the app will damage your computer, macOS reports known malware, or the file has an unexpected name or size, stop and contact MyPassRecovery support. Do not run the commands below.
Apple explains that macOS checks Developer ID signatures and notarization, and warns that overriding these protections can expose a Mac to malware. See Apple's guidance on safely opening Mac apps and Apple's explanation of modified or damaged apps.
Recommended Method: Open Anyway in System Settings
After confirming that the app came from the official source:
- Drag
MyPassRecovery.appinto the Applications folder. - Try to open it once, then close the warning.
- Choose Apple menu > System Settings > Privacy & Security.
- Scroll to Security, find the message about MyPassRecovery, and click Open Anyway.
- Enter the administrator password or use Touch ID, then confirm Open.
Apple notes that the Open Anyway option is normally available for about one hour after an attempted launch. This creates an exception only for that app. See Open a Mac app from an unknown developer.
If macOS Still Says the App Is Damaged
Use this fallback only after MyPassRecovery support confirms that the download is authentic and intact. Open Terminal and first check whether the app has a quarantine attribute:
xattr -p com.apple.quarantine "/Applications/MyPassRecovery.app"
If the attribute is present, remove only that attribute from this specific app bundle:
xattr -dr com.apple.quarantine "/Applications/MyPassRecovery.app"
If the downloaded app bundle has a different name, replace the quoted path with its actual .app path. To avoid typing mistakes, type xattr -dr com.apple.quarantine (including the final space), drag the app from Finder into the Terminal window, and then press Return.
Then Control-click MyPassRecovery.app in Finder, choose Open, and confirm the prompt. The xattr -d option removes a named extended attribute and -r applies the operation within the app bundle; see the macOS xattr manual.
Do not use sudo spctl --master-disable, do not disable Gatekeeper globally, and do not clear quarantine attributes from the whole Downloads or Applications folder. If the targeted command does not solve the problem, delete the app, download a fresh copy from the official source, and contact MyPassRecovery support.
macOS Interface and Screenshot Note
The screenshots below are reused from the Windows guide because the MyPassRecovery document-processing workflow is the same: sign in, select the protected file, wait for analysis, submit or save the result, and verify the output. Window controls, file-picker appearance, fonts, and paths may look different on macOS. Follow the labels in your installed macOS build when a screen differs.
Page Summary
When a PowerPoint presentation has editing restriction enabled, you may be able to open the file, but slide content, text boxes, images, shapes, or other objects may be difficult or impossible to modify. This guide shows how to use MyPassRecovery Desktop to remove PPT editing restriction by importing the protected presentation, analyzing the protection type, saving the unrestricted output file, and confirming that the new PPT file can be edited normally.
What Is PPT Editing Restriction?
PPT editing restriction refers to protection that prevents normal editing of a PowerPoint presentation. The file may open, but users may be unable to edit slide text, change images, adjust shapes, or modify slide content as expected.
MyPassRecovery Desktop can handle PowerPoint files protected by editing restriction or read-only protection. When the software recognizes this protection type, it can remove the editing restriction and generate a new PPT output file that allows normal slide editing.
When to Use This Guide
Use this guide when a PPT or PPTX file opens successfully but slide editing is blocked by editing restriction.
- The presentation opens, but slide content cannot be edited.
- Text boxes, images, shapes, or objects are difficult or impossible to modify.
- The presentation appears protected or read-only.
- You need a new PPT file without editing restriction.
When This Guide Does Not Apply
If the PowerPoint file asks for a password before opening, it is a PPT open password recovery case, not an editing restriction removal case. If the presentation is damaged or locked by operating system permissions, that problem is not PPT editing restriction.
Before You Start
Before removing editing restriction, prepare MyPassRecovery Desktop and the protected PowerPoint presentation. Close the presentation in Microsoft PowerPoint for Mac or WPS Office for Mac before importing it.
- Install MyPassRecovery Desktop. The free quick check does not require sign-in; sign in only when submitting a subscribed cloud-recovery task.
- Prepare a PPT or PPTX presentation with editing restriction.
- Place the presentation in a local folder, such as
~/Documents/MyPassRecovery/PPT Editing Restriction/. - Close the presentation before importing it into the software.
Operation Steps
Step 1: Open MyPassRecovery Desktop
Open MyPassRecovery Desktop and make sure the app is online; sign in only if you are submitting a subscribed cloud-recovery task. The client should be online and ready to analyze the presentation before you remove editing restriction.
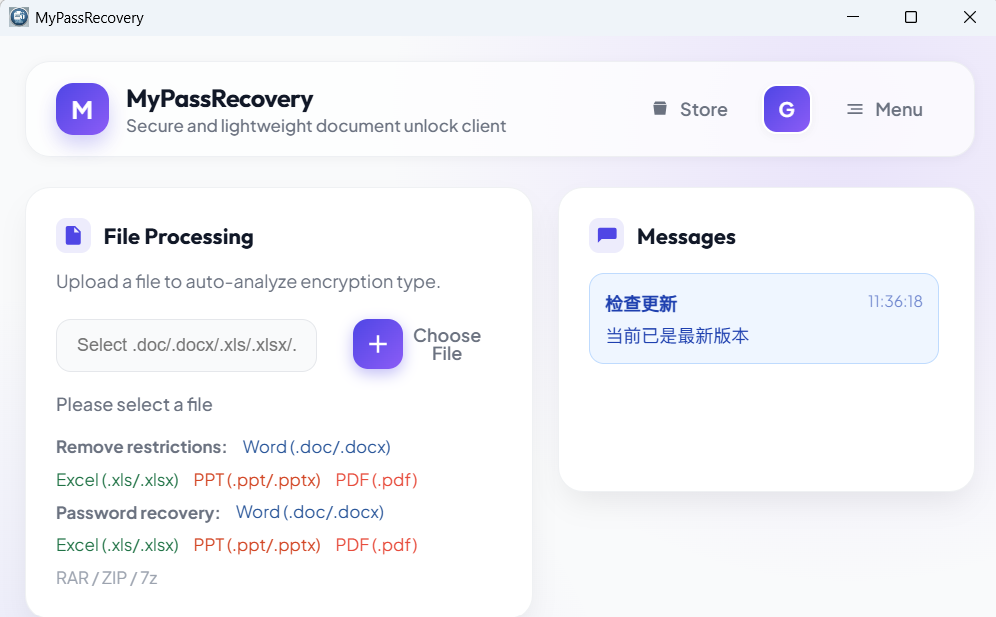
Step 1: Open MyPassRecovery Desktop
Step 2: Import the PPT File with Editing Restriction
In the Document Processing area, click the file selection button and choose the PPT or PPTX file that has editing restriction. After import, MyPassRecovery Desktop reads the path and identifies the file type and protection method.
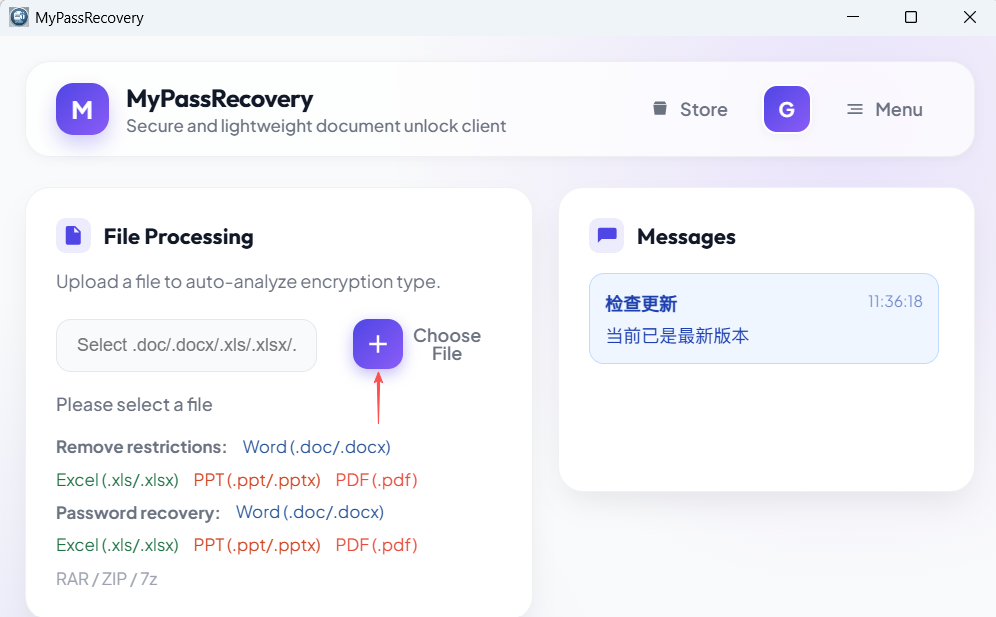
Step 2: Import the PPT file with editing restriction
Step 3: Wait for Editing Restriction Analysis
After the file is imported, MyPassRecovery Desktop checks whether the presentation contains editing restriction, read-only protection, an open password, or another protection type. For a PPT file that only has editing restriction, the client should indicate that the protection can be removed directly.
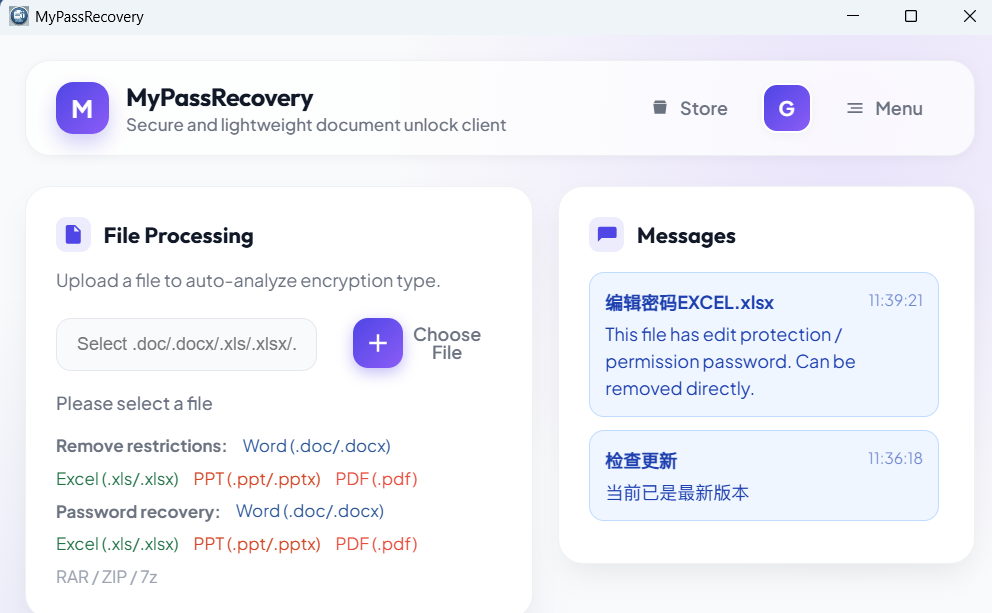
Step 3: The software detects PPT editing restriction
Step 4: Remove the Editing Restriction
After the software identifies PPT editing restriction, click Save or the available removal button. MyPassRecovery Desktop generates a new PPT output file without the previous editing restriction.
Step 5: Open the Output PPT File
Open the new output presentation in Microsoft PowerPoint for Mac. Confirm that slide text, images, shapes, and objects can be edited normally. If slide editing is available, the editing restriction has been removed.
Result
After the process is complete, the original presentation remains unchanged, and MyPassRecovery Desktop creates a new PPT file with the editing restriction removed. Use the output presentation when you need to edit slide content, text boxes, images, shapes, or other objects.